Table of Contents
Take a Photo in Mixed Reality
This guide outlines the steps for capturing photos within the MRplugin-autotooltip__default plugin-autotooltip_bigMixed Reality (MR)
Mixed Reality, ist eine Technologie, die die physische Welt mit computergenerierten Elementen in Echtzeit verbindet. Im Gegensatz zur reinen Virtual Reality, bei der der Nutzer vollständig in eine digitale Welt eintaucht, und Augmented Reality, bei der digitale Elemente über die reale Welt gelegt werden, ermöglicht Mixed Reality eine Interaktion zwischen realen und virtuellen Objekten. In der Regel sieht der Nutzer die reale Welt, durch Kameras aufgenommen, als Abbild seiner … view using either voice commands, hand controllers, or the global menu.
Managing Browser Permissions in Headset
If you need to verify or update the permissions for the headset's built-in browser (such as camera or microphone access), follow these steps inside your device:
- Open Settings
- In the settings panel, select Privacy & safety, then click on Installed apps.
- Find the browser app in your list of installed apps.
- Ensure that permissions like Virtual Camera, Headset Camera, and Microphone are toggled On
Granting Browser Permissions
A browser notification or dialog box will appear asking for permission to use your Microphone and Camera. click allow access for the virtual camera, headset camera and microphone 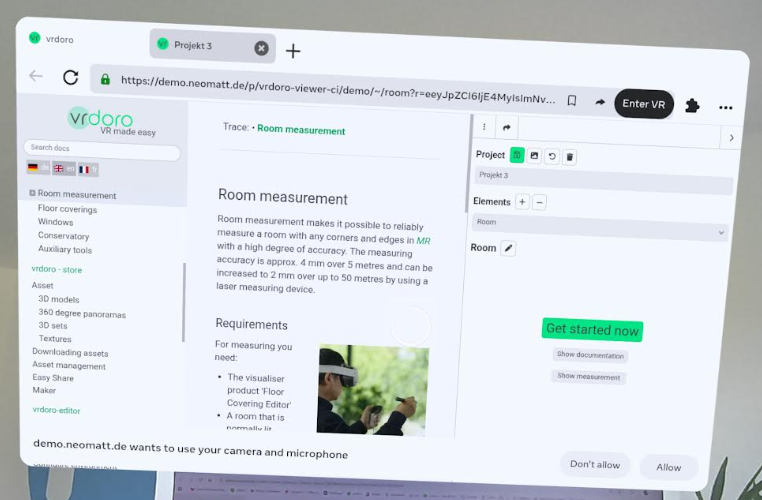
What to do if you accidentally denied permissions
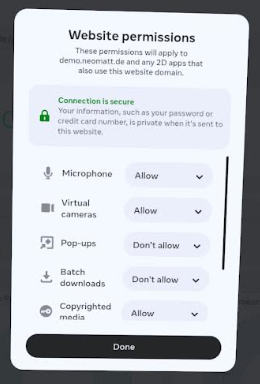
If you clicked “Dont allow” or “Deny” on the initial permission prompt, the Mixed Reality camera will not activate. To fix this and grant access later:
- While in the Meta Quest Browser on the application page, look at the URL address bar at the top.
- Click the Padlock icon (Site Information) located just to the left of the website address.
- Select Site Permissions from the dropdown menu.
- Find Camera and Microphone (and “Immersive VRplugin-autotooltip__default plugin-autotooltip_bigVirtual-Reality (VR)
Virtual Reality (VR), zu Deutsch virtuelle Realität, ist eine computergenerierte, interaktive Umgebung, in die eine Person vollständig eintauchen kann. Mithilfe spezieller Geräte wie VR-Brillen wird die reale Welt vollständig durch eine simulierte ersetzt. Der Nutzer erlebt eine dreidimensionale, künstliche Umgebung, die alle Sinne ansprechen kann.” if listed) and change their status from Blocked to Allow. - Reload the webpage for the changes to take effect and launch the MRplugin-autotooltip__default plugin-autotooltip_bigMixed Reality (MR)
Mixed Reality, ist eine Technologie, die die physische Welt mit computergenerierten Elementen in Echtzeit verbindet. Im Gegensatz zur reinen Virtual Reality, bei der der Nutzer vollständig in eine digitale Welt eintaucht, und Augmented Reality, bei der digitale Elemente über die reale Welt gelegt werden, ermöglicht Mixed Reality eine Interaktion zwischen realen und virtuellen Objekten. In der Regel sieht der Nutzer die reale Welt, durch Kameras aufgenommen, als Abbild seiner … view again.
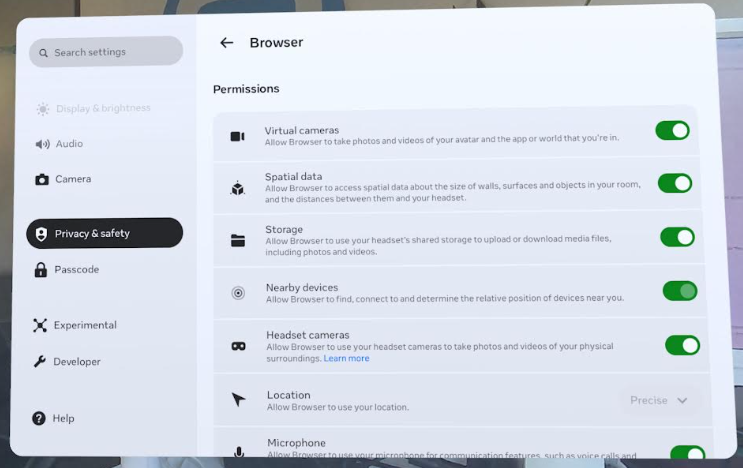
If you need to verify or update the permissions for the headset's built-in browser (such as camera or microphone access), follow these steps inside your device:
- Open Settings.
- Navigate to Privacy & safety > Installed apps .
- Select the browser app from the list.
- Ensure that permissions like Virtual Camera, Headset Camera, and Microphone are toggled On.
Access the Capture Tool
You can trigger a photo capture using any of the following methods:
- Using Voice Commands with the Stylus Pen : Press and hold the middle button on your stylus pen. Look for the red microphone icon to appear, indicating that the system is actively listening for your voice. While holding the button down, clearly speak your command phrase (e.g., “Take photo” or “Capture photo”). Keep the button pressed until you finish speaking your command, then release it.
- Opening the Context Menu: Click on the green icon located on the floor grid to bring up the context menu options. The button you see depends on whether you have already taken photos:
- If you have no images yet: You will see a Camera icon. Click this icon inside the menu to trigger the snapshot process directly.
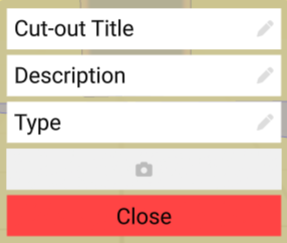
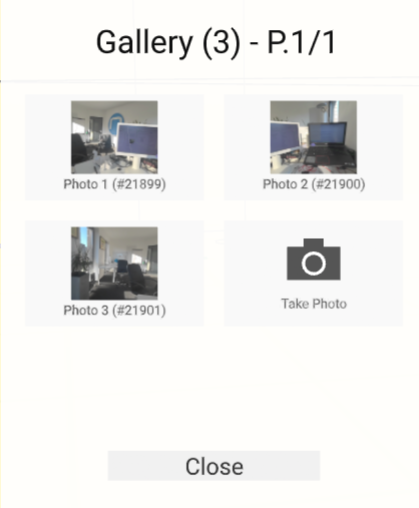
- If you already have images: The Camera icon is replaced by a Gallery button in the context menu.
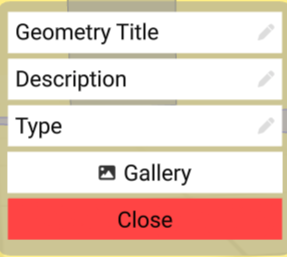
- Click it to open the gallery panel, which displays all your saved images. To take a new picture, click the Take Photo tile inside the gallery. (Note: This “Take Photo” option is only available while in the MRplugin-autotooltip__default plugin-autotooltip_bigMixed Reality (MR)
Mixed Reality, ist eine Technologie, die die physische Welt mit computergenerierten Elementen in Echtzeit verbindet. Im Gegensatz zur reinen Virtual Reality, bei der der Nutzer vollständig in eine digitale Welt eintaucht, und Augmented Reality, bei der digitale Elemente über die reale Welt gelegt werden, ermöglicht Mixed Reality eine Interaktion zwischen realen und virtuellen Objekten. In der Regel sieht der Nutzer die reale Welt, durch Kameras aufgenommen, als Abbild seiner … view).
- Opening from the Help Panel: Click the front button on your stylus pen to open the Help Panel. In the top-left corner of the panel, the button you see depends on your current gallery state:
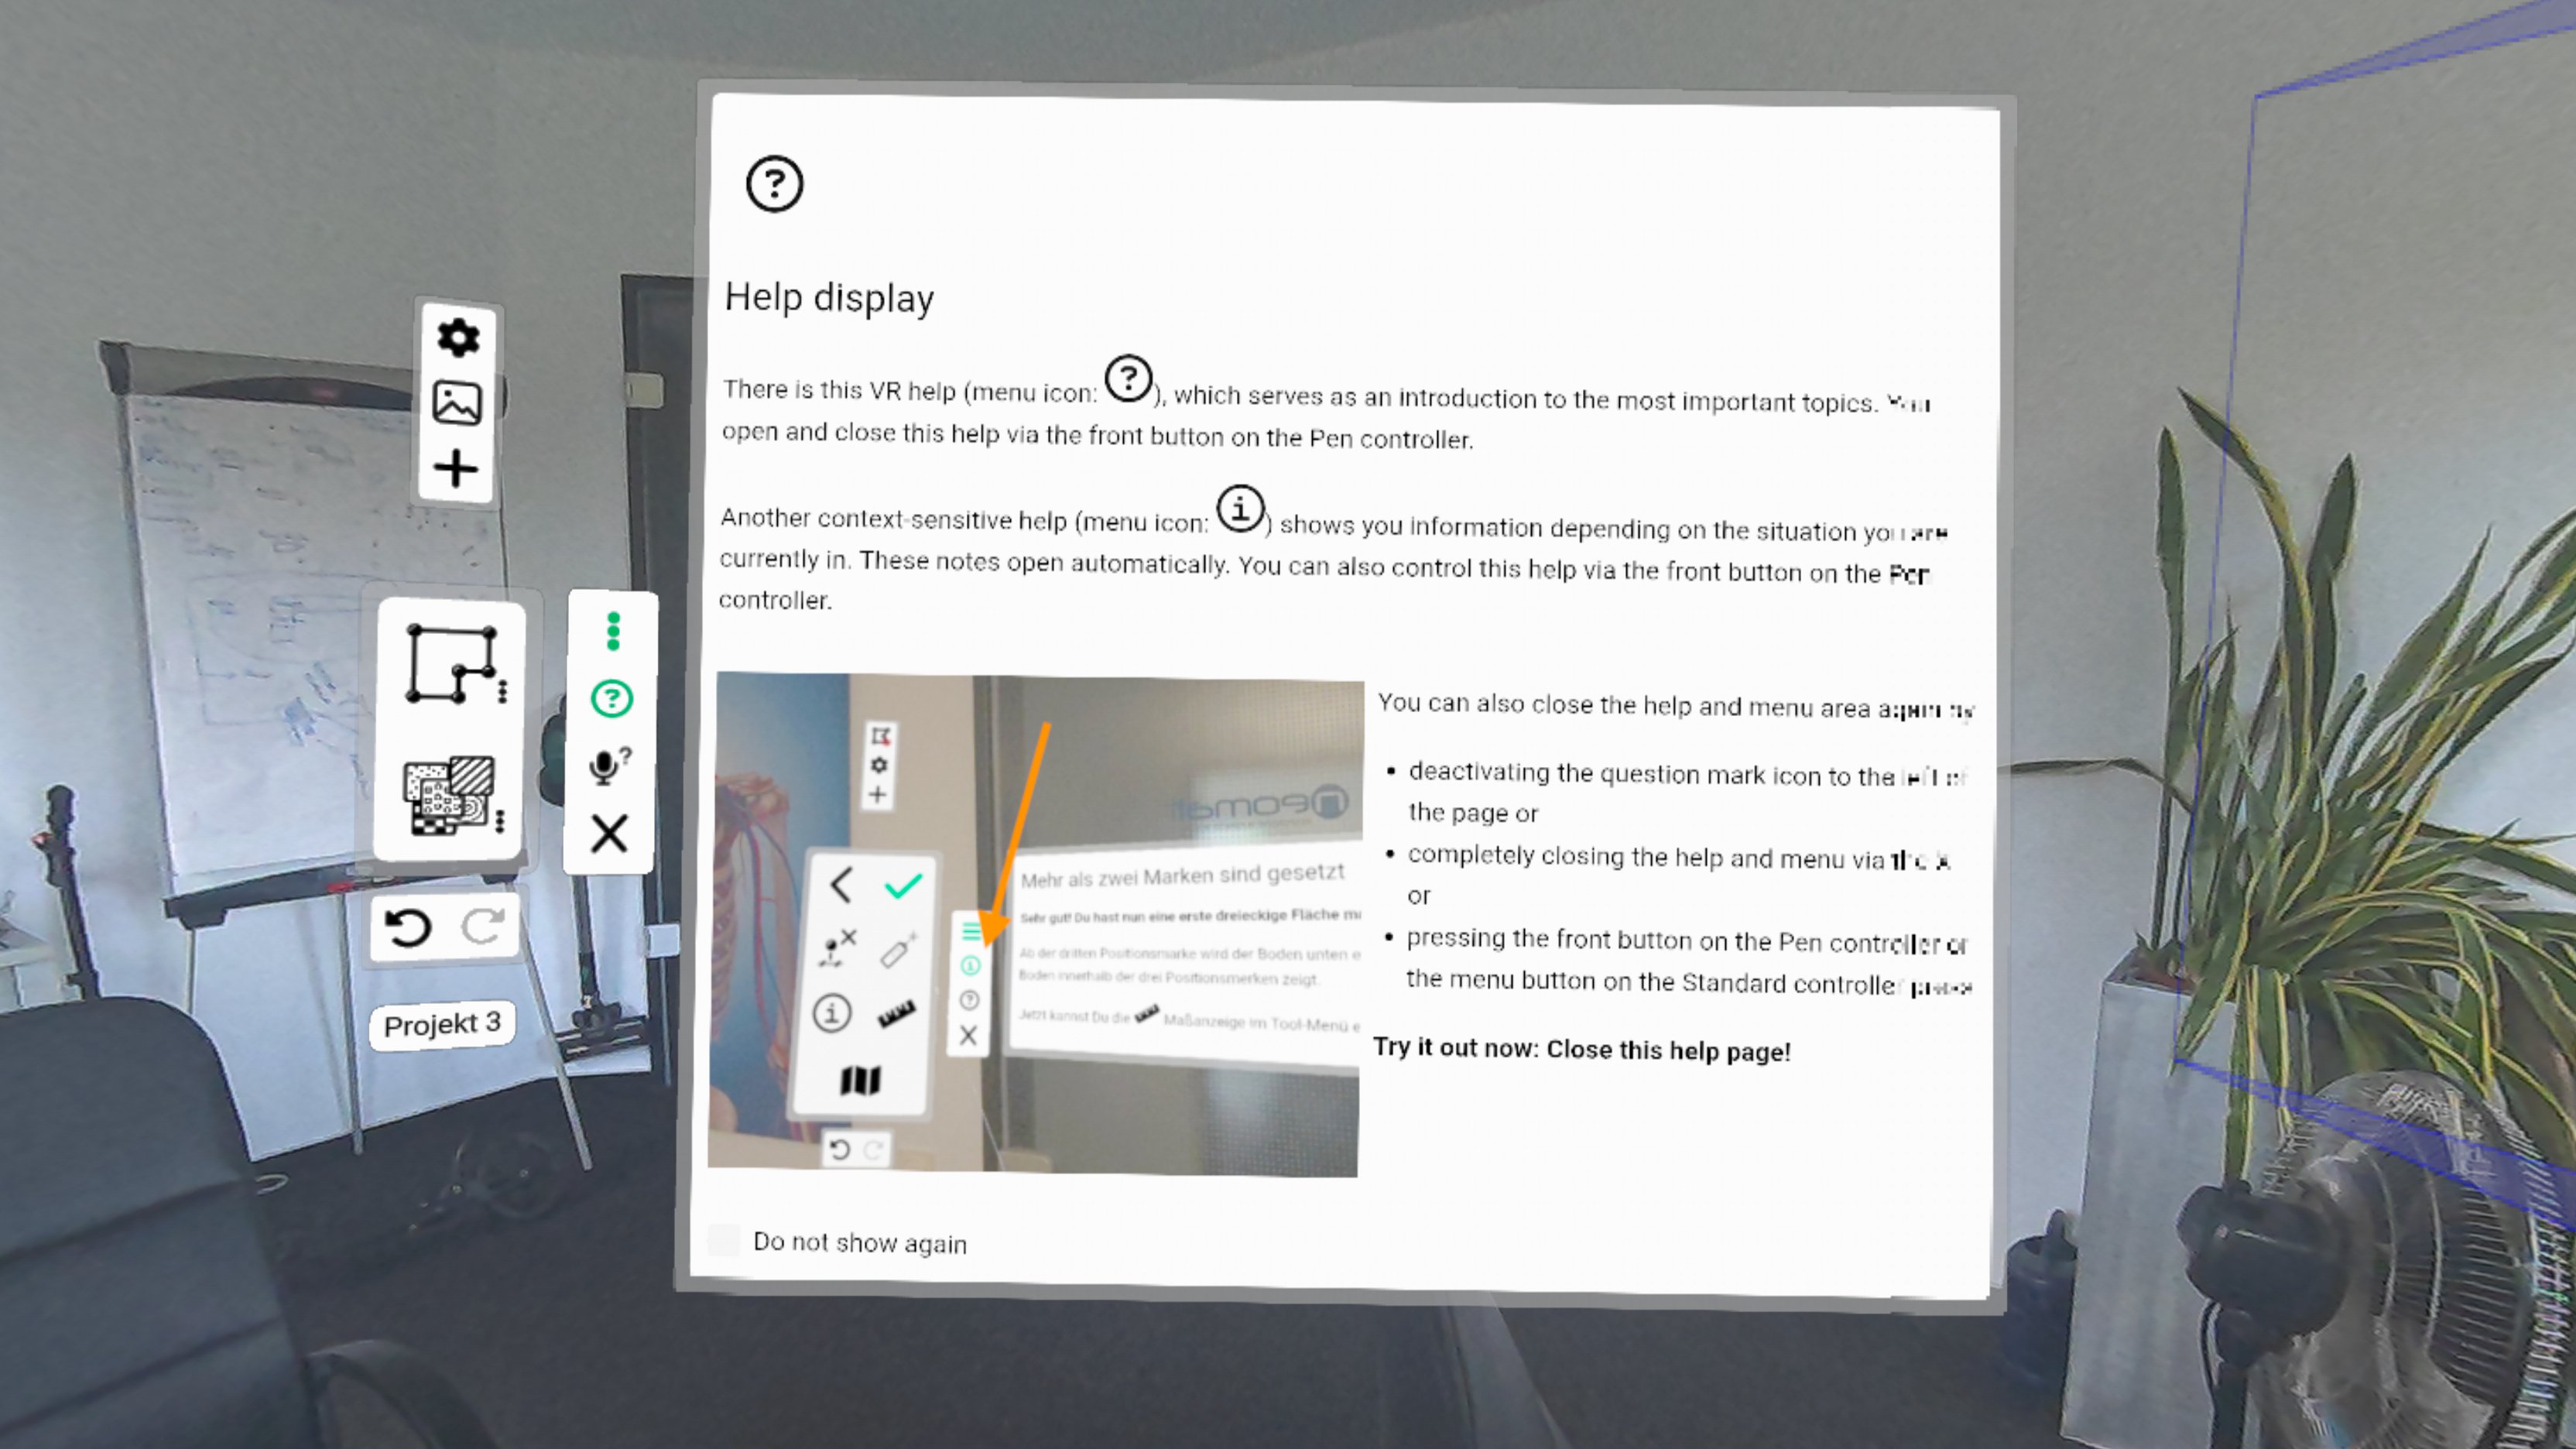
If you have no images yet, you will see a Camera icon. Click this icon to trigger the snapshot process directly. If you already have images, you will see a Gallery icon. Click it to open the gallery panel to view your saved images, or click the Take Photo tile inside the gallery to capture a new one.
Confirmation and Saving
- Once triggered, a visual countdown (starting from 3) will appear in your display
- When the countdown reaches zero, you will hear a camera-click sound indicating the snapshot has been taken.
- Where the image is saved depends on how it was captured:
- Via Help Panel or Voice Commands: The image is saved to the overall room state (Roomviewer Roomstate).
- Via Context Menu: The image is saved directly to the specific element you interacted with.
Viewing Photos in 3D Space
When you browse your gallery and click on an image tile, the photo will open in full size on a floating image plane. To help you understand the spatial context of the photo:
- An emoji avatar will appear in your room.
- This emoji marks the exact physical position where you were standing when the photo was taken.
- The emoji is oriented to look in the exact direction the camera was pointing, and the enlarged image plane will automatically position itself to face the emoji.