Set UV mapping

UV mapping is in essence a method of laying the object out flat in order to orient texturesplugin-autotooltip__default plugin-autotooltip_bigTexture

A texture is an image that is displayed on the surface of a virtual body in order to change the surface properties such as colour, roughness, metalness, normal vectors and others.
onto them.

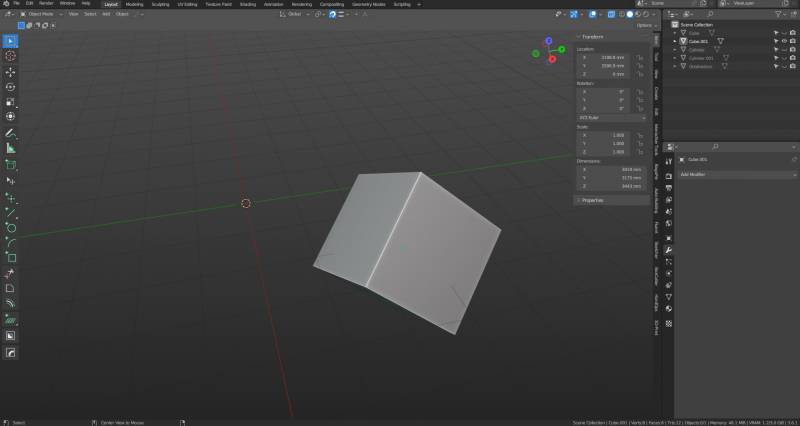
The best appraoch is to mark sharp edges for simplicitys sake.

aligning_1_1_.jpg

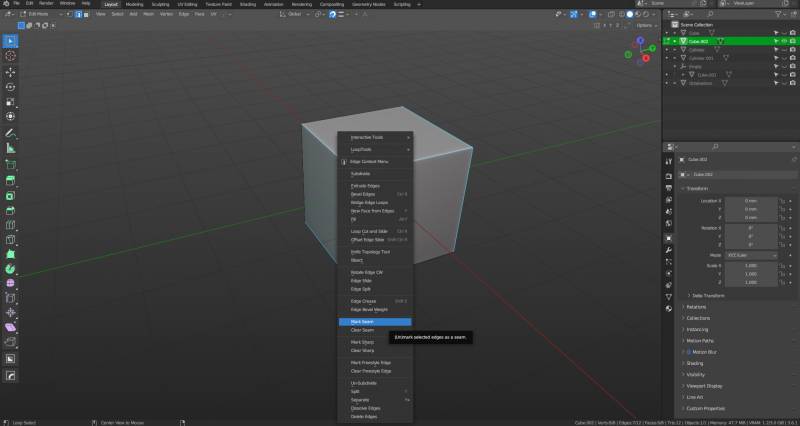
Enter edit mode (tab) and select the edges (2 for edge select) where the seams should be.

unwrapping_3_.jpg

With the necessary edges selected, right clickplugin-autotooltip__default plugin-autotooltip_bigClick

Depending on the device, clicking refers to the user action for selecting an element. For devices with a mouse, this means pointing to the element followed by pressing the left mouse button. On devices with touch displays, this refers to tapping or tapping and holding (iOS: long touch).
and select “mark seam”. This is where the model will be “split” in UV space, and should be indicated by a different colour.

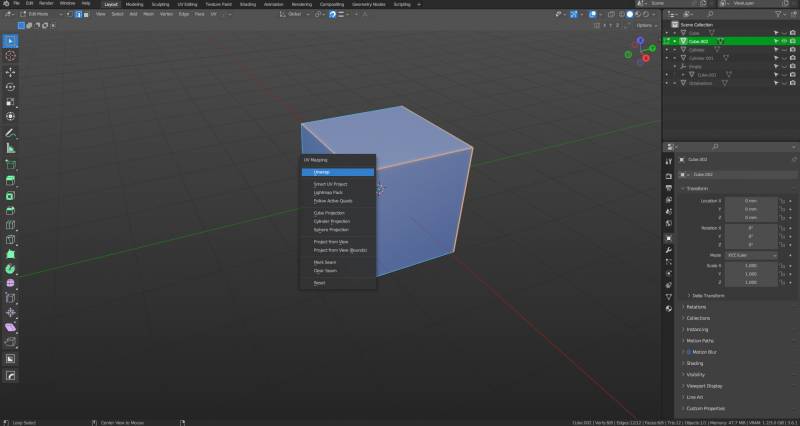
unwrapping_4_.jpg

Press A to select everything on the object, then U and choose either “unwrap” or “smart unwrap”. Depening on the model, one or the other will produce better results. In addition, smart unwrap allows you to set a cutoff angle for UVs- in other words, what degree of angle and edge can have before it is split on the UV map.

In addition, an orthagonal or square UV map makes the process of texturing easier, so it is ideal to ensure the unwrap results are like the ones above.

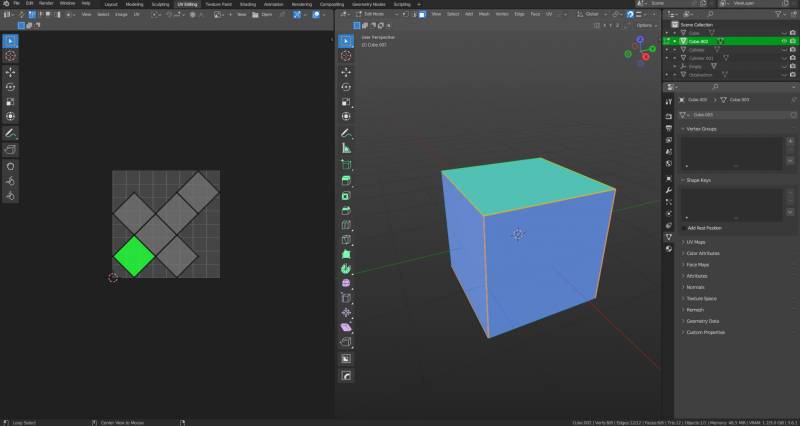
unwrapping_5_.jpg

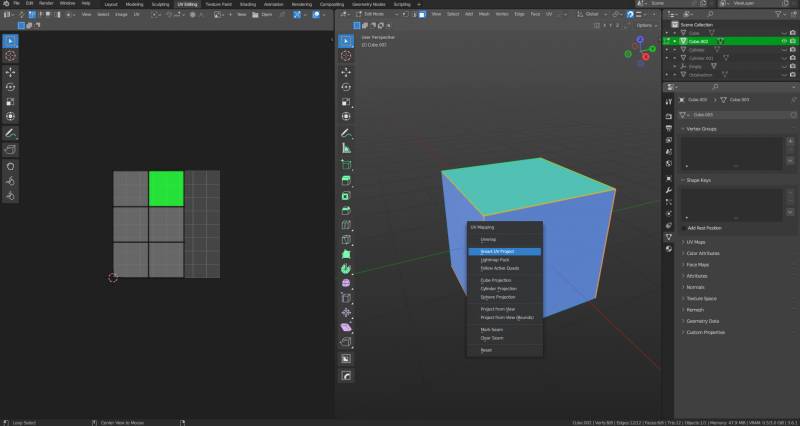
On the top row of tabs, select UV Editing. The left screen shows the object unwrapped and essentially laid flat.

By contrast, if we unwrap with “UV project” (note: blender works as normal in the right side window, there is no need to switch workspaces), the program breaks the cube into 6 flat squares. This is because the edges of the cube are above 89 degrees, which is the highest angle limit possible to set. Whatever is above this limit, will be a seperate UV. This is not ideal for seamless texturesplugin-autotooltip__default plugin-autotooltip_bigTexture

A texture is an image that is displayed on the surface of a virtual body in order to change the surface properties such as colour, roughness, metalness, normal vectors and others.
, hence smart unwrapping is more useful for complex objects, and the angle limit must be experimented with.

The point is more obvious the example of a cylinder. If we mark seams along edges and on one edge of the cylinder, press A and then U, the normal “unwrap” option simply cuts the mesh along the seams and lays the cylinder flat.

By contrast, this is the result of smart project. Note that the walls of the cylinder have been laid flat in 1 piece, whereas the ends are seperate UV faces. This is again because the edges between the faces which make the wall of the cylinder are below the angle set in the angle limit, and the edges on both ends are 90 degrees- above the angle limit.

NoteThis result (cylinder side unwrapped in 1 conjoined piece) is ideal for most texturesplugin-autotooltip__default plugin-autotooltip_bigTexture

A texture is an image that is displayed on the surface of a virtual body in order to change the surface properties such as colour, roughness, metalness, normal vectors and others.
, since it creates the smallest possible number of noticable edges in the textureplugin-autotooltip__default plugin-autotooltip_bigTexture

A texture is an image that is displayed on the surface of a virtual body in order to change the surface properties such as colour, roughness, metalness, normal vectors and others.
.

Also important is to ensure the results are orthagonal or square, this will help texturesplugin-autotooltip__default plugin-autotooltip_bigTexture

A texture is an image that is displayed on the surface of a virtual body in order to change the surface properties such as colour, roughness, metalness, normal vectors and others.
to display in the correct orientation.