This is an old revision of the document!
Colouring
The following steps show the quickest method of colouring an object, without importing texturesplugin-autotooltip__default plugin-autotooltip_bigTexture
A texture is an image that is displayed on the surface of a virtual body in order to change the surface properties such as colour, roughness, metalness, normal vectors and others. or UV maps
Select a Colour
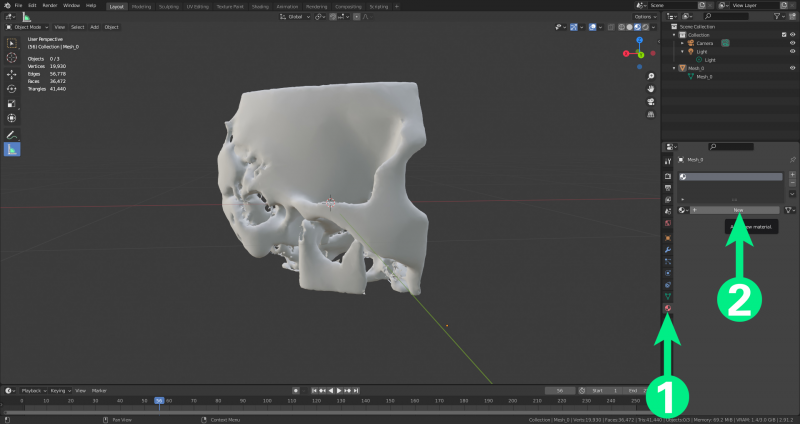
Select the object, then:
- clickplugin-autotooltip__default plugin-autotooltip_bigClick
Depending on the device, clicking is the user's action to select an element. On devices with a mouse, this means pointing at the element and pressing the left mouse button. For devices with a touchscreen, it is touching or touching and holding (iOS: long touch). In the in the “material” tab (a red/black ball) - clickplugin-autotooltip__default plugin-autotooltip_bigClick
Depending on the device, clicking is the user's action to select an element. On devices with a mouse, this means pointing at the element and pressing the left mouse button. For devices with a touchscreen, it is touching or touching and holding (iOS: long touch). In the on “New”
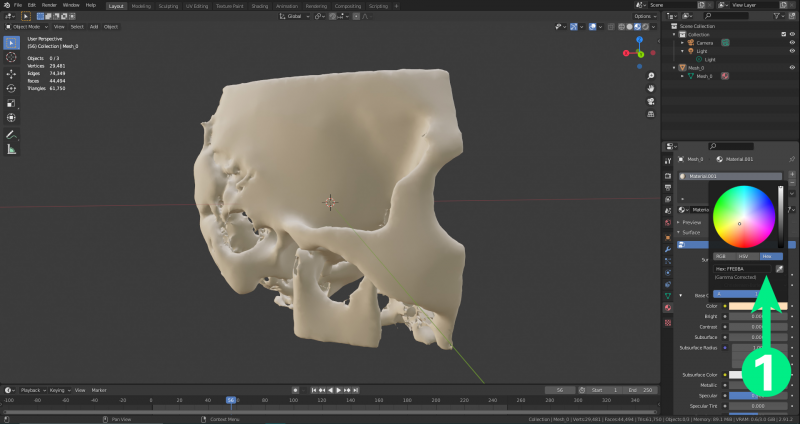
The “new” tab opens options, from which you can choose “colour”. There are multiple possible options to choose: Hex, RGB or HSV (1). It’s also possible to manually choose a colour on the colour wheel, but this reduces accuracy if a desired colour is desired.
Applying the colour
As long as you have not applied the colour to the object, you will not see the colour in some viewers. To apply the colour, switch to “Edit Mode”. You will then see an “Assign” button under the material area. Press this button to assign the colour to the model.


