Dies ist eine alte Version des Dokuments!
Modelle zurecht schneiden
Ein Modell kann durch folgende Schritte zurecht geschnitten werden.
While working on models there are often cases where the geometry of the model needs to be removed or otherwise modified. There are multiple options, explained here from most simple to most complex. For scalable partial models, e.g. for a carport kit, it is advisable to cut the variable-length elements to sections that are exactly one metre long. This means that any model length can be achieved by scaling the variable model axis.
1) Cutting
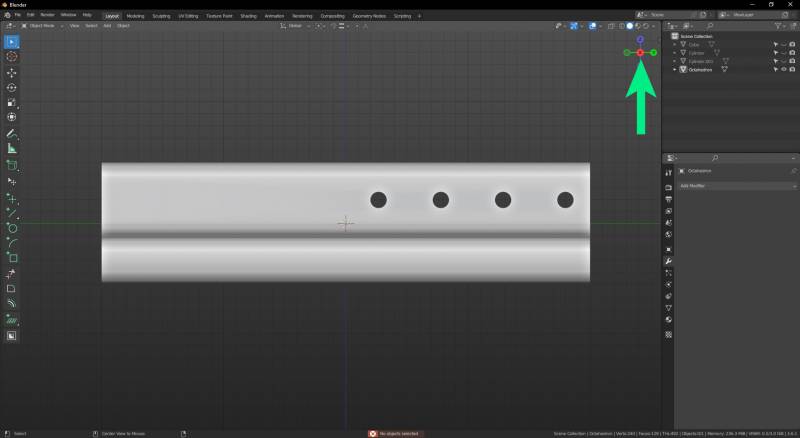
In this case, the object we are working with has bolt holes on the right side, which we don't want since it increases vertex count and shading issues caused by the holes.
To make a straight cut, we need to enter isometric view mode.
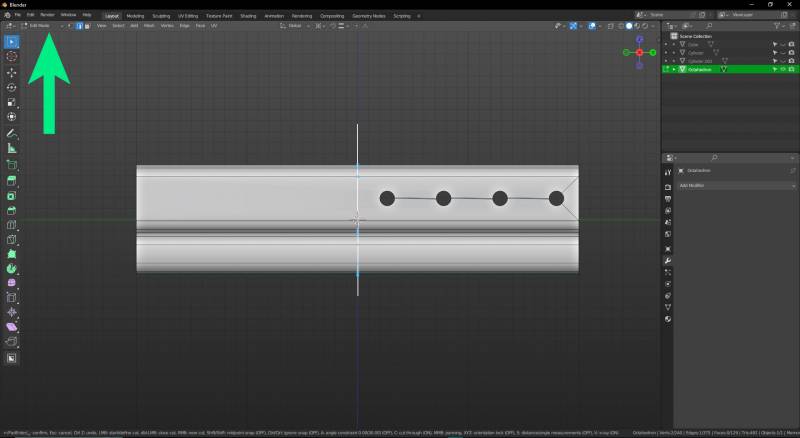
A cut can only be made in edit mode (to enter and exit press the tab key, or the dropdown on the top left). Press the K key to use the cut tool and then C to make the cut through the whole object. Click to start the cut, and click again to end, then Enter to confirm the cut action.
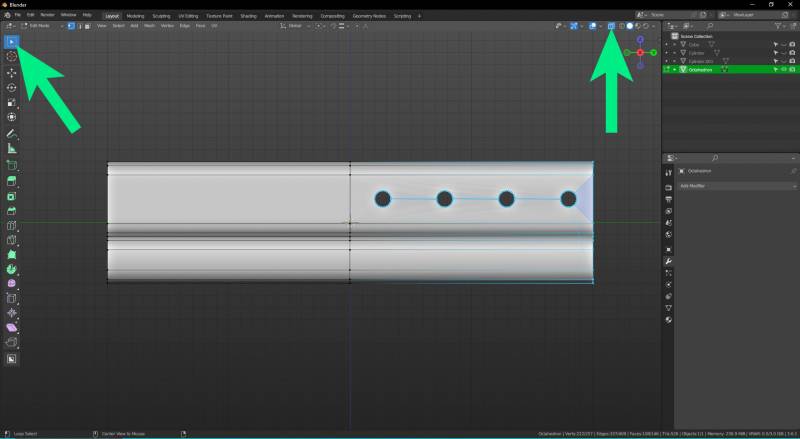
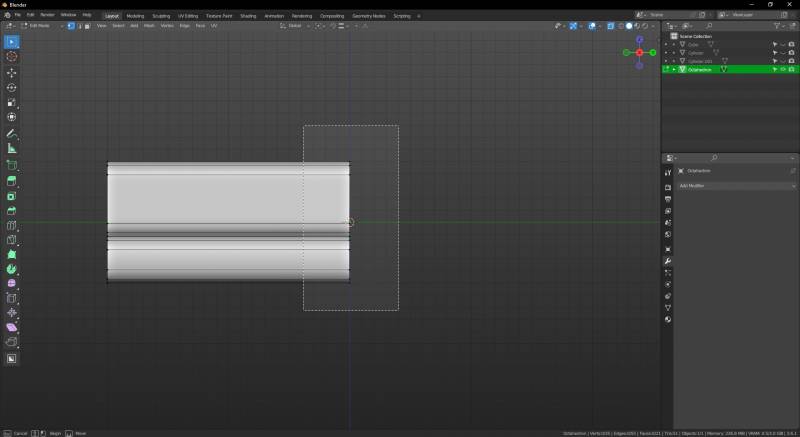
To select vertices through the entire model, use X-ray mode (see arrow top right), then use box select to choose all the geometry on the side that is to be deleted.
Select the vertices on the edge (still in x-ray mode)
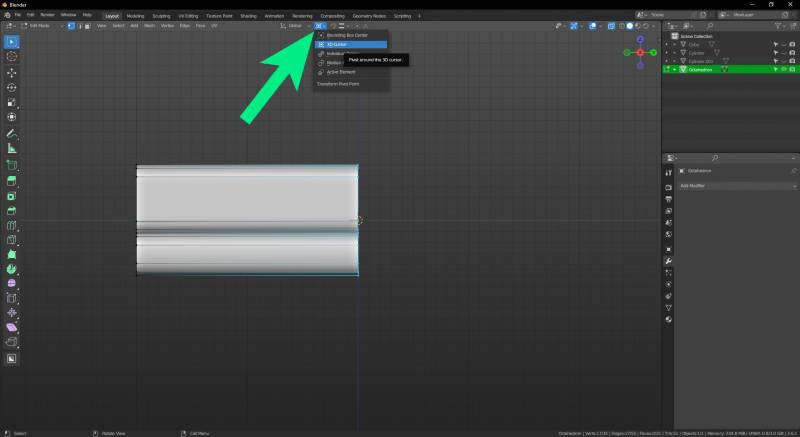
Switch the transform orientation to Cursor. This will cause scaling to use the cursor as the reference point for this operation. (ensure the cursor is in the world center by using Shift-S → curso to world center)
With vertices on the deleted side selected, press the S key to scale, then the X,Y or Z key to lock to the axis to be scaled upon, then press 0. This scales all vertices to zero on the world origin, which was selected in the last step.
Return to object mode (tab or top left menu), and with the object still selected, click on the modifier tab (the wrench on the right tool panel), then click „add modifier“, and choose the mirror modifier.
Make certain that only one axis is selected. This will mirror the selected object which uses the same origin as the last steps as the point of mirroring.
Apply the modifier
Enter edit mode and x-ray mode, then select the edge loop created in the middle from the mirror operation, and press X to dissolve it.
2) Replacing surfaces
In some cases, it's quicker to simply replace a face that has unwanted geometry.
In this example, there is a hole through the box which is not needed.
Switching to edit mode (tab or drop-down menu on the top left), choose face select (3 key or the 3 icons top left), simply select the faces around the hole.
With faces selected, press the X key and choose „delete faces“
The faces are gone, but now the hole itself remains.
Select these faces in the same way (or use loop select)
Switch to edge select (the 2 key or click on the icon on the top left) and select edges accross from one another. (Note: the hole on the other side is ignored for the sake of brevity)
With both edges selected, press the F key to fill the gap with a new face.
To ensure the new face is facing the correct way, select face orientation from the drop down menu (see the arrow). Blue should be facing outwards, red inwards.
3) Rebuilding from profile
This method is most practical on objects that are symmetrical. This is most useful if a lot of the geometry has broken edges, or a large number of issues that would otherwise take a long time to correct.
Note: the object is centred on the world origin and cursor. We can also see the length of it on the axis we want to use (see arrow).
Entering edit mode (tab) we can see the poor geometry around the holes. Since it isn't needed, it's quicker to simply get rid of most the geometry.
Entering x-ray mode (shift+X, or the icon on the top right next to the viewport shading buttons) and switching to isometric view, select all of the geometry except one end- the profile.
Press the X key and choose „delete vertices“.
This results in a single end piece. We will use this to extrude the form again, this time without holes.
Select all the vertices around the edge and press the E key to extrude. Press the x y or z key to lock to the axis needed (in this case y). We want it to be the same as the original so we simply need to type 1 (alternatively 100 or 10000 depending on if Blender is set to Metre, centimetre or millimitre). Once the correct length is obtained, press enter or click the left mouse button.
Because the object was centred and the length was given, the piece has been rebuilt from the profile of the original.


